 Reliable Service
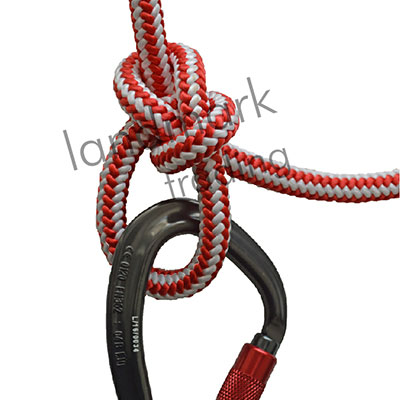
A Guide to Basic Tree Climbing Knots, pt.2
A sound knowledge of knots is something that you as an arborist are going to draw on time and again throughout your career. Whether it is to work safely at heights, ensure a safe descent or to attach one item of equipment to another, knots are indispensable to an arborist’s role.
Knowing how to properly tie knots, however, is only half of the equation – you also need to know which knots are appropriate in any given situation.
In our last article on basic tree climbing knots, we focused primarily on the hitches, but in this article, we aim to give a more comprehensive overview of knots that are used in a wider variety of situations.
More Useful Knots and How to Tie Them
You may already be familiar with the terminology, but before we get started, we want to clarify a few standard terms used within knot tying. These terms are pretty self-explanatory, but just to make sure the instructions are clear, here they are.
Tag end: The end of your line. This is the part that does the knot-tying.
A standing line: The rest of the line that runs up toward the reel.
Turn: Sometimes called a wrap. A turn occurs when you pass the tag end completely around the standing line.
Bowline
Even if you only use 3-4 knots regularly, the Bowline will be one of them. As such it is an extremely important knot to learn if you are looking to practise arborism. Although it isn’t the easiest knot to tie, it is extremely versatile in its application and can be used for a number of scenarios.
- Creating an eye in a rope
- Attaching a casualty in rescue situations
- Attaching your rigging line to a branch
How to Tie a Bowline
- Start by laying the rope across your left hand with the free end hanging downwards. Create a small loop in the line that’s in your hand.
- Bring the free end (the right-hand side) and pass it through the eye of the loop from the underside – until it is through the hole.
- Wrap the line around the standing line (underside) and back down through the loop (overside).
- Then tighten the knot by pulling on free end while holding the standing line.
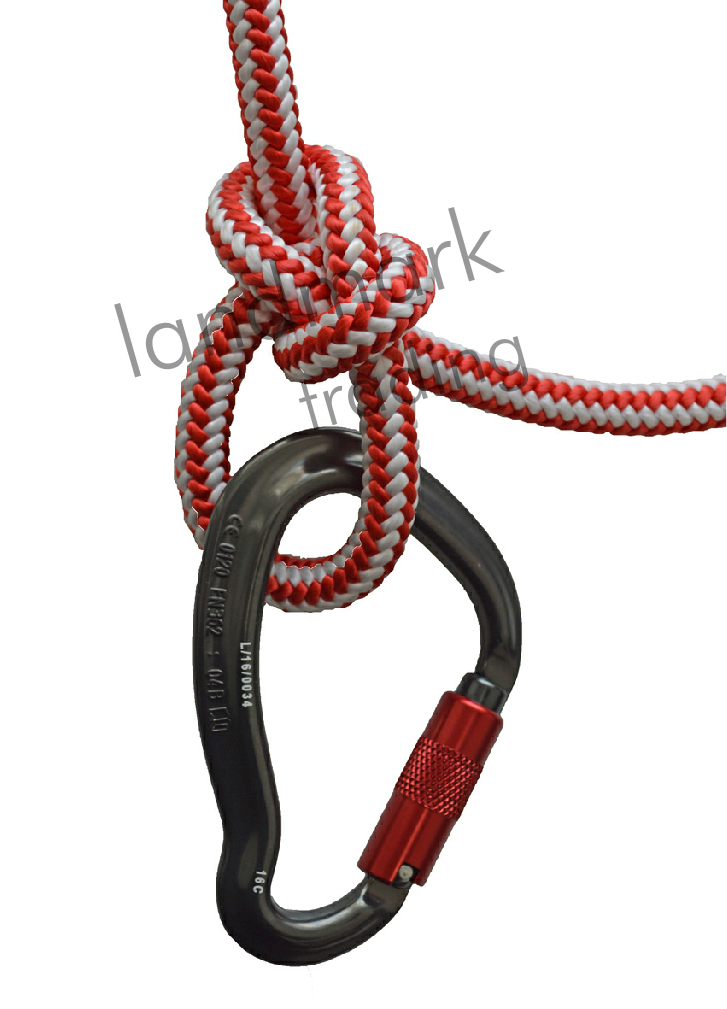
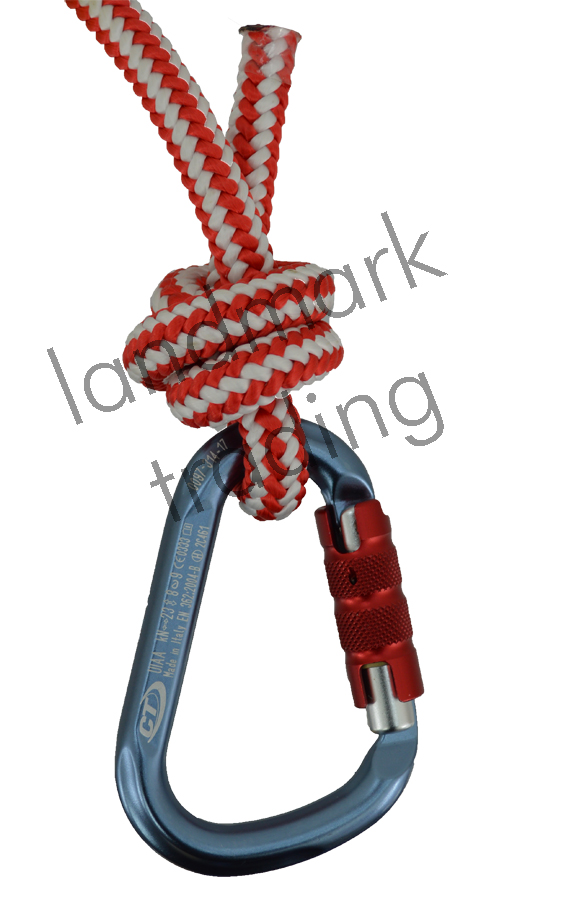
Running Bowline
The Running Bowline looks similar to the common Bowline knot, except for one thing – the bowline is a static knot, while the main loop of the running bowline is adjustable, producing a noose or a sliding loop. The knot does not bind against the standing line and can be easily undone.
Uses for the running bowline include the following:
- Retrieving or tying off tree limbs that are out of reach
- Anchoring the climbing line
- Creating a pull line
How to Tie a Running Bowline
- Double the end of a rope and wrap the tag end over, then under the standing line and up to the side of the new loop created.
- Make a small loop on the topside of the original loop by twisting the line over itself.
- Feed the tag end through the small loop.
- Wrap the tag end once around the topside of the large loop and then back down through the small loop.
- Pull tag end tight creating a fixed loop that the main line can slip through.
If the job requires a more secure line than what the running bowline has to offer, you can make it more durable by finishing it off with a Yosemite Tie Off. To add this to your running bowline, just follow these steps.
- Take the tag end and pass it around the main loop, and,
- Tuck it back under the collar
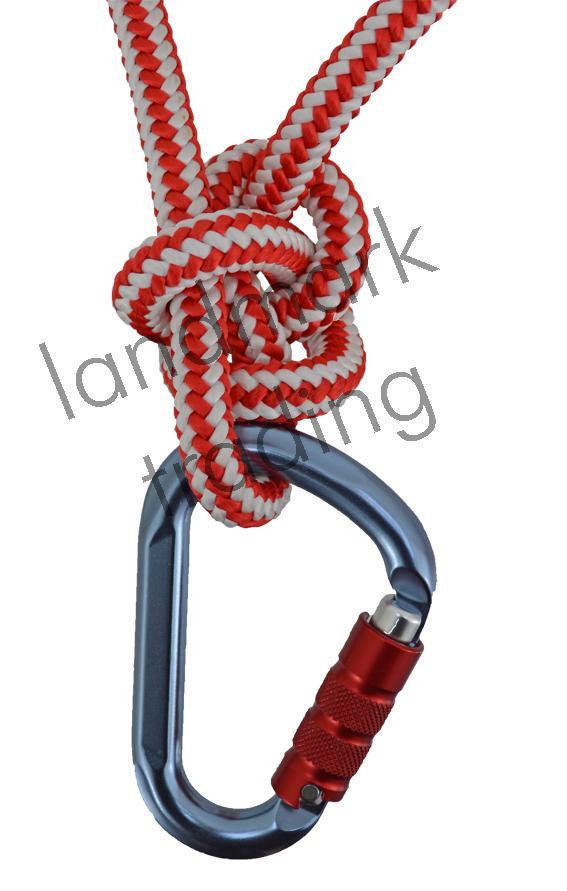
Figure of Eight
The Figure of Eight, or sometimes the Flemish or Savoy knot, acts primarily as a stopper on the end of a positioning lanyard. The Figure of Eight tends to be used more than other stopper knots due to how easy it is to release when jammed.
How to Tie a Figure of Eight
- Tie a single eight in the rope two feet from its end. Pass the free end through any tie-in point if desired.
- Retrace the original eight with the free end leaving a loop at the bottom of the desired size.
- Pull all four strands of rope to cinch down the knot.
Fisherman’s Knot
The Fisherman’s Knot is the colloquial (and more commonly used) term for the Improved Clinch knot.
Whether you’re working with fishing hooks or karabiners, the Fisherman’s Knot is largely used to firmly secure objects to a line.
How to Tie a Fisherman’s Knot
- Run the tag end of the line through the eye of the hook and pull 8–10 inches of line through the hook eye.
- Wrap the tag end around the standing end for a couple of wraps – although for extra security, five is usually the golden number.
- Now pass the tag end through the loop next to the hook eye to create another loop that contains all your wraps.
- Pass the tag end through that loop.
- Hold the tag end and standing end in one hand and the bend of the hook in the other; then pull with steady pressure.
- If you are not sure about safely holding the hook, grip it firmly but not super firmly with some pliers and tighten slowly.
- Clip the tag end so that only 1/8-inch is left.
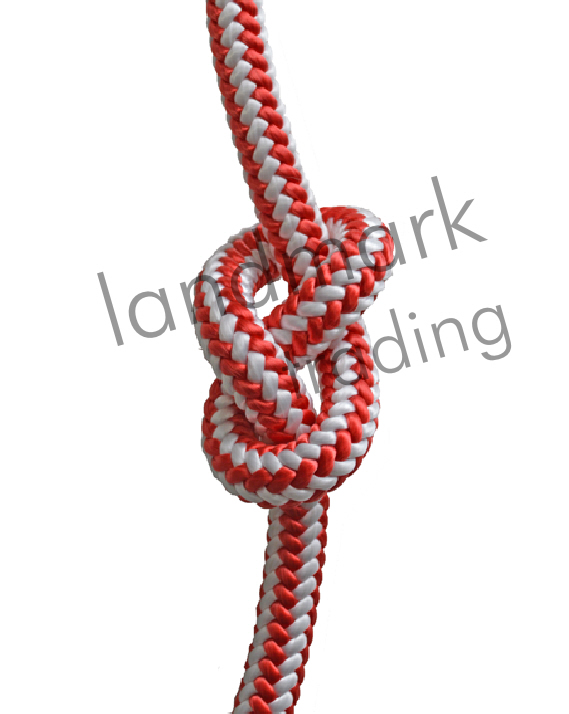
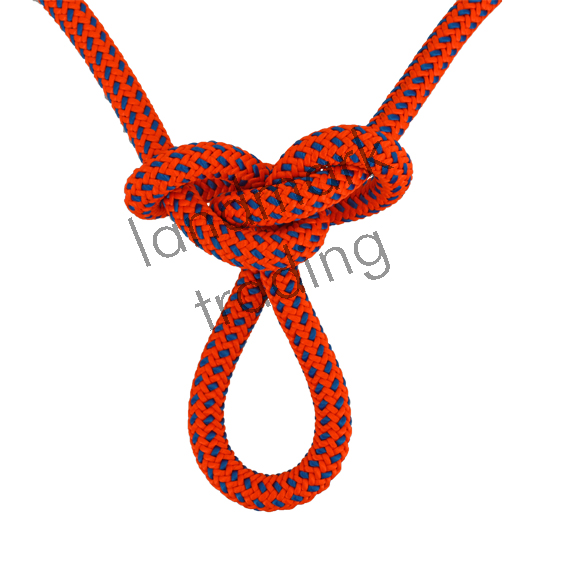
Alpine Butterfly
All the knots we’ve introduced so far are created by moving the tail end of the rope. However, when both ends of the rope are already tied down onto something, and you need a secure loop in the middle, the Alpine Butterfly is your go to.
The knot is very useful if you need loops to attach equipment to or hang devices from. Alpine Butterfly knots are also great starter loops for the Trucker’s Hitch, which we’ll show you further on.
A huge bonus of using the Alpine Butterfly is that it doesn’t jam no matter how much strain is applied to it. After the knot serves its purpose, you can easily undo it by pulling apart the two vertical lines of rope at the collar.
How to Tie the Alpine Butterfly
An Alpine Butterfly knot is useful for making non-slip loops in the middle of a rope to attach carabiners to provide purchase points for a winch line and is capable of taking loads in any of the three directions, independently or together.
The Alpine Butterfly knot is relatively simple to tie. As it is primarily used to form a secure knot in the middle of a rope, we’ll show you an example of how to tie one in a rope that is already attached to another object.
For ropes already attached to objects:
- Make a loop in the rope and twist it one full rotation into a figure of eight shape.
- Fold the top of the eight down around the bottom of the eight.
- Now pull it up and out through the lower opening of the eight, ensuring that it forms a tight knot.
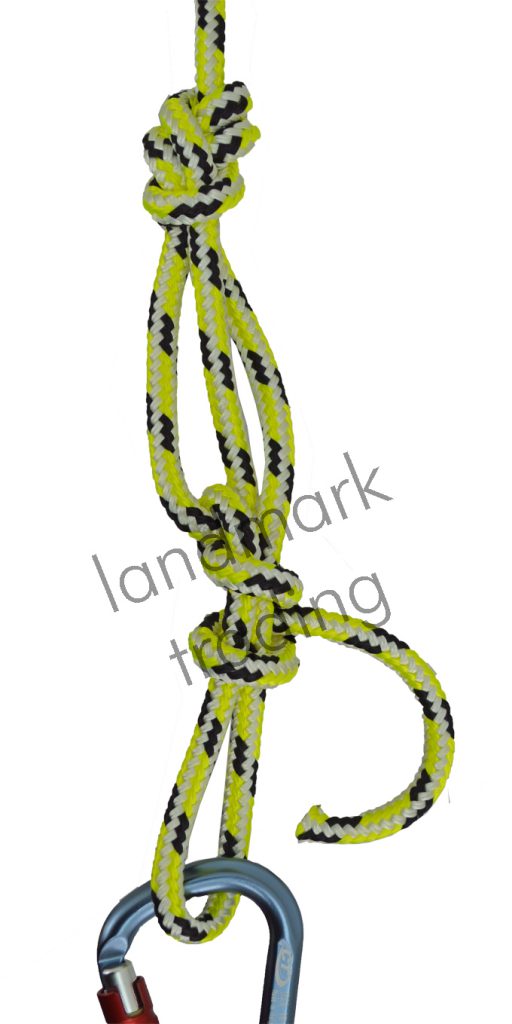
Trucker’s Hitch
The trucker’s hitch is known by several names, including the dolly knot, the timber hitch and the carter’s hitch. It is best known as the trucker’s hitch due to the fact that it is frequently used to secure a load to a truck or to double the load that a rope can withstand in transit.
The strength of this knot means that it is sometimes used when felling a tree to control the direction of a fall. By using the trucker’s hitch as a pulley, you can slowly guide the tree while cutting it down. It’s also used for load dragging.
The hitch doubles the strength of the rope, so it’s like pulling an object using two ropes. It also gives you twice the mechanical advantage, so any effort you make into pulling the object is doubled.
How to Tie a Trucker’s Hitch
Although useful, the Trucker’s Hitch is notoriously difficult to tie. Requiring the knowledge of how to tie another knot, such as a half hitch, as a starter knot. As such, we’ll include the steps necessary to tie a half hitch, underneath the Trucker’s.
- Tie one end of the rope to a fixed object such as car bumper.
- About midway on the rope tie a slippery half hitch to form a loop in the middle of the line. Ensuring that the loop part is formed with the slack part of the rope or it will tighten down on itself under pressure.
- Make a wrap around another fixed point opposite the tie-in point and feed the free end through the loop.
- Using the loop as a pulley, pull down with the free end as tight as you can and secure the knot with two half hitches around one or both lines.
How to Tie a Half Hitch
- Pass the tag end under the standing part of the rope.
- Bring the end up and pass it through the eye of the loop you just formed.
- Pull it tight to complete a half hitch.
For more information on properly maintaining your ropes and staying safe while using them, take a look at our blog here: https://www.landmarktrading.com/blog/rope-safety/
Or, to shop any of the climbing equipment mentioned in this article, look here; https://www.landmarktrading.com/arborist-equipment/climbing-equipment.html and https://www.landmarktrading.com/arborist-equipment/climbing-equipment/rope-and-rope-care/climbing-ropes.html