 Reliable Service
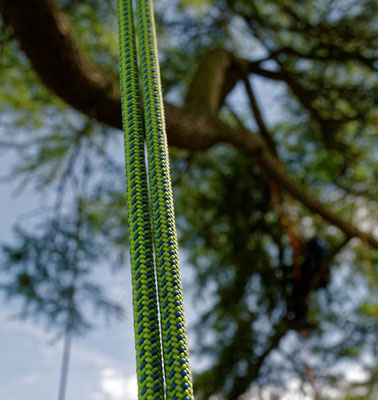
A Guide to Rope Throwing and Throwlines
You might often wonder how tree surgeons get their ropes into position high up in the tree canopy, without having to ascend the tree to get it up there first?!
Welcome to the world of rope throwing and throwlines. In this article we’re going to look at the tools and the techniques used by arborists, allowing them to install a rope high in the tree without even having to leave the ground.
Rope Throwing
Overhead rope placement on a secure and stable tie in point (TIP) can and should be achieved before any feet leave the ground (climbing irons or not). This can be achieved in a number of ways.
The simplest method is to simply throw your rope over the desired branch from the ground. There are a number of tried and tested techniques to do this (with it taking years to master the perfect throw) but this method does present some obvious disadvantages.
- Climbing ropes can be heavy and can only be thrown so high (no good if you need to get high into the canopy to work).
- It’s easy to get your rope snagged in a branch, especially if the tree has a dense canopy, meaning the rope can get stuck or make it very difficult to reach the target branch.
For relatively low down branches though, rope throwing can be the quickest and most appropriate method to get a good TIP and start ascending.
The thrower needs to create a weight with which to propel upwards and over the desired branch. This is done by taking several coils of rope and tying it off in what’s sometimes known as a ‘monkey’s fist’ or ‘bullet’. This is then hauled overhand, underhand or backwards over the head, with a few loose coils to reduce rope drag as the tied off rope coils ascend.
How do Throwlines work?
The method used by most tree surgeons today is to use a throw line and a throw weight. This is a lightweight polyethylene line (usually around 3mm diameter) attached to a small throw weight encased in a nylon bag (usually between 8-12oz). The weight acts in the same way as the coils of rope in a ‘monkey fist’ but because it is far more compact and attached to a lightweight line, can be thrown far higher. An experienced arborist can use a throwline to get a TIP of up to 60 feet.
The only disadvantage of using a throwline, compared to rope throwing, is the potential for tangles. This is especially true with thickly branched trees, especially those that have a lot of low down branches. In these circumstances, a better strategy can be to create multiple TIPs as the climber ascends.
Throwing Techniques for Throwlines
Below we’ve outlined the steps to preparing, tying and executing the perfect rope install using a throwline.
- Arguably the most important step in using a throwline is making sure your throwline is nice and neat. A tangled or knotted line is likely to get snagged on branches.
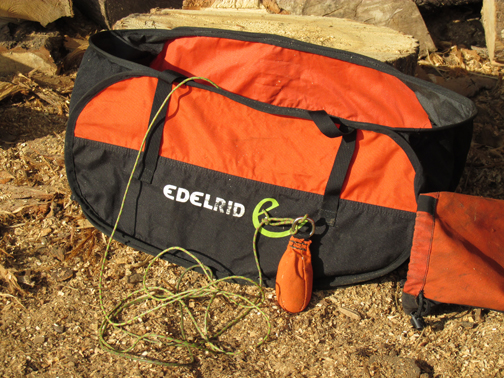
- Flake your throwline into a wide container, such as a throwline bag or throwline storage cube. This will stop the line getting caught or snagged on any debris on the ground. (Storing your throwline in this way will also help prevent the need to untangle next time you take it out.)
- Tie the throwbag onto the throwline using a secure knot that is also easy to undo, such as a slippery clove hitch.
- There are two main throwing techniques for using a throwline. Which one you use is really down to personal preference:
- The first technique is to have one arm by your side creating a pendulum swing before aiming and releasing the throwline
- The second technique is to make a cradle with the throwline going through the ring of the throw weight. A pendulum motion is then made but going through the legs, with one a hand on each side of the triangle shaped cradle.
- Alternatively, a Big Shot catapult can be used to install the throwline. This handy (and fun!) tool can accurately propel a throw weight 100 foot or more. Another virtue of the Big Shot is that it allows you to fire a throwbag from directly below the branch in a vertical trajectory. With a bit of practice, this method is not only powerful but precise, enabling quick and accurate installation of a line.
- Once you’ve successfully got your throwline over your target fork, you can then manipulate the line, depending on whether you’re using a single or double rope system to ascend.
- You then need to install your cambium saver (sometimes referred to as a friction saver), as a ‘false crotch’ through which your rope passes. This prevents the rope being damaged by the tree and vice versa.
- You now need to install your climbing rope and secure your TIP. This is done by tying the throwline to the rope using a clove hitch, starting about 10 inches from the end of the line. Then tie two or three half hitches up to the rope end. If your rope has an eye, then you could use a couple more half hitches to compress the eye and allow the rope to travel through the friction saver without issue.
- It is, of course, critical to carefully test any anchor point thoroughly before ascent
Like ropes, it’s important to look after your throwline, properly coiling it at the end of the day to avoid kinks and ensure smooth running when in use. Also, it’s important to remember that however good your throwline technique, safety always comes first so make sure your rope is in good condition and that you are using the correct PPE for the task in hand.
Once you’ve understood the mechanics of how throwlines work, then it really just comes down to mastering the technique. This isn’t as easy but is a useful skill which can be successfully acquired over time. Good luck!